Introduction
Hello, in that tutorial some Zbrush plugins are requires.
http://www.pixologic.com/zbrush/downloadcenter/zplugins/
- Decimation Master
- Uv Master
Step by Step
Draw The Tree Shape
1. Create a tree with The Zsphere
Preview : A
Adaptive skin > Density : 1
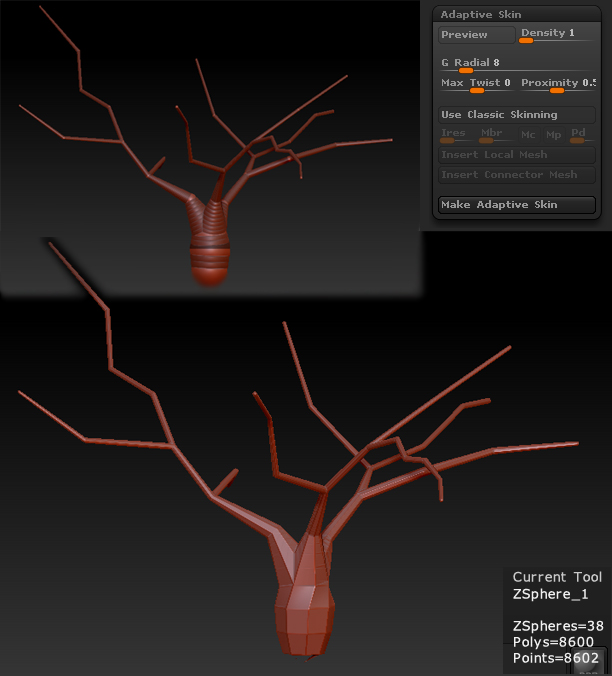
The model is composed by 8600 polygons! we will reducing the model before making the uvmap.
2. Click on Make Adaptive Skin with the density set to the level 1.
3. Click on Make Polymesh 3D
4. Save/Keep the Zsphere on the side for the rigging lately.
Reducing the Polycount
Here we will need the Decimation plugin installed.
But first, we will making the masking, this step is very important, this is the weak point of my work, i am sure that step can be improved to have a better control on the mesh density.
1. Create the masking on the thee ramification to preserve the original Shape
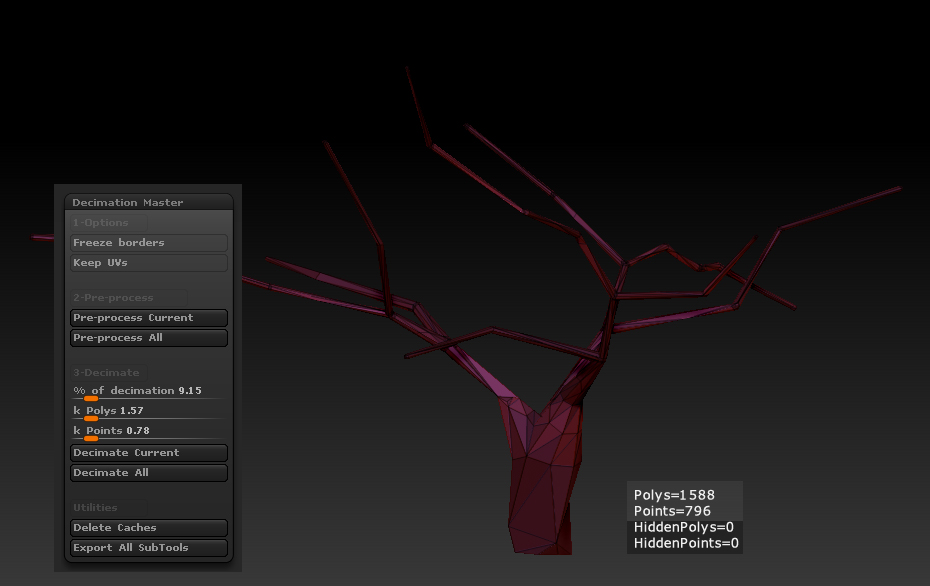
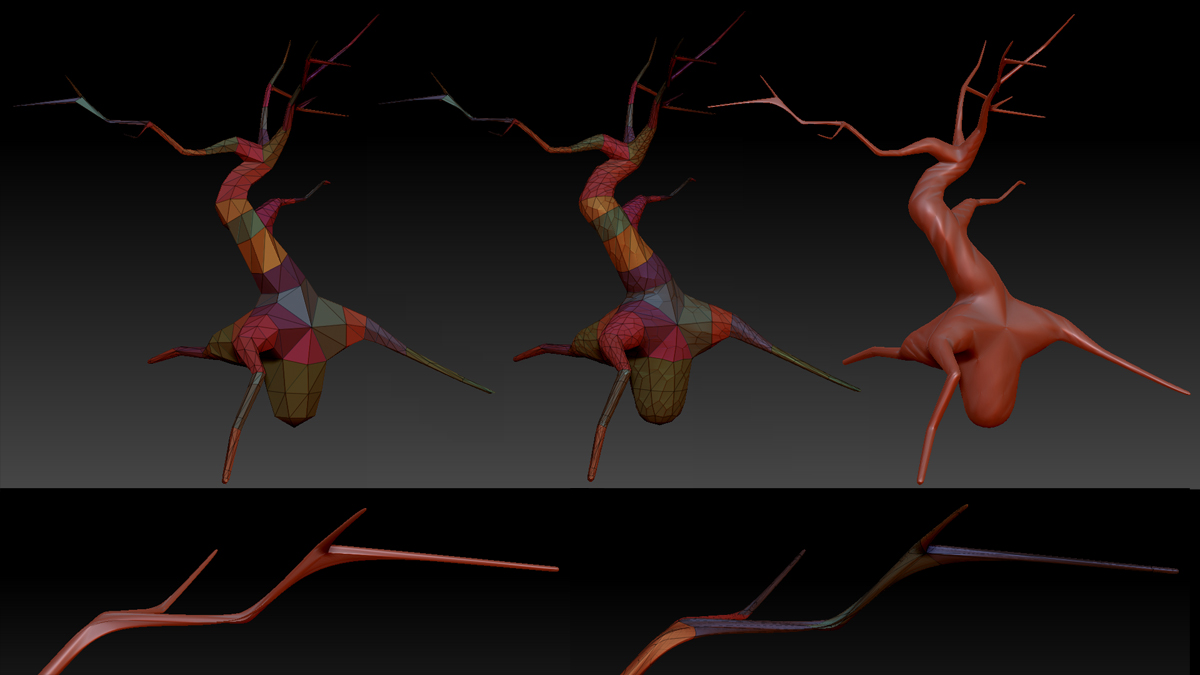
2. Apply the Decimation
- I haven’t checked Freezed Border, but you can testing by yourself what option give you the result that you are happy with it .
- I only play with the % of decimation give a low value, big value give you a poor reduction.
- Click Pre-process or Pre-process all if you apply it on several subtools.
- Click Decimate Current or Decimate All if you apply it on several subtools.
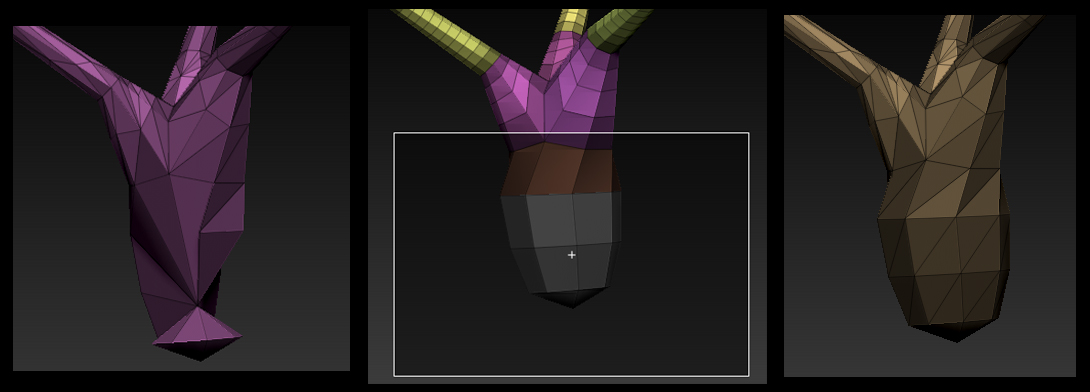
The shape looks good from there, but.. you must check every branches of the tree.
Several errors dues of the masking that can generate a bad geometry.

3. Undo the decimation and refine your mask following these tips.
You must knows, that every time you change the masking, you Must absolutely, execute the Pre-Processing Current / All command.
[/su_box]- Use a little Brush Size
- Use Lasso tool to create the mask.
- Protect the ends of each branch from the tree, just to prevent your branches to end with a spike shape, that’s very important.

- Improve the Base of the tree trunk.
When you get happy with the result save the model to an Obj file, we are going to fix up the mesh into an external 3d modeling software.
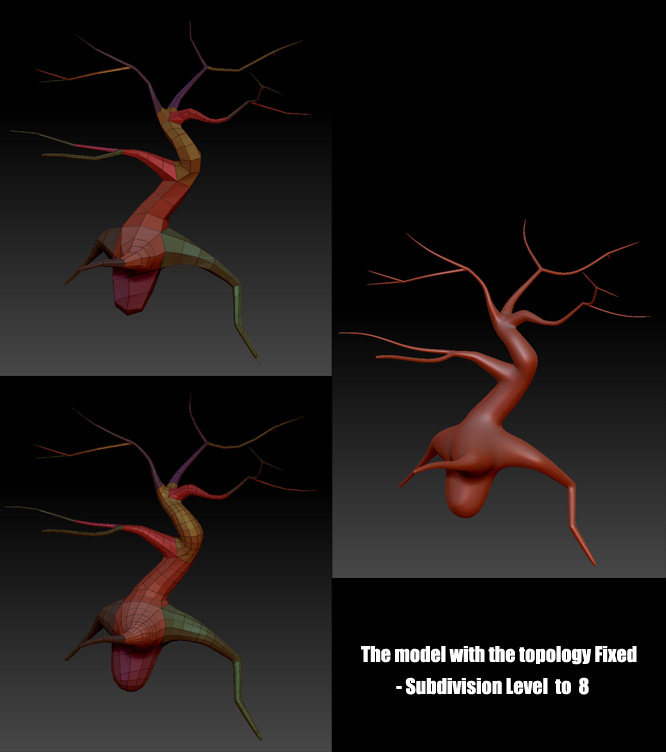
Fix The Topology
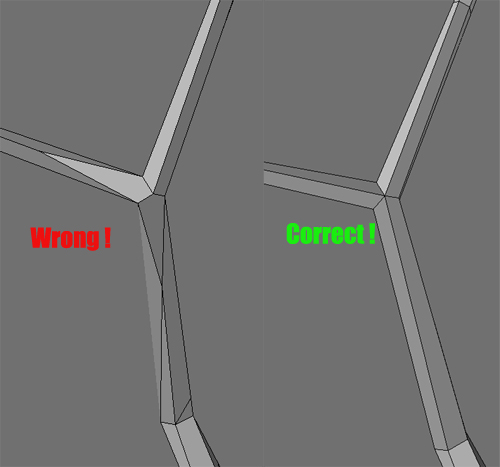
If you apply a subdivision on your model now, and you inspect the model, you will see something like this :
When you subdivide a model with too much triangles the subdivision, give a bad aspect on your model. To fix the problem i only find one good solution not too long to be done with.
We will editing the model in a modeling sofware of your choice, here i used lightwave.
1. Load the Obj File into your 3d software
2. Apply a quadrangulate , with Lightwave I use the “Merge trigonX” script, but Maya or 3DSmax got the tools you need to
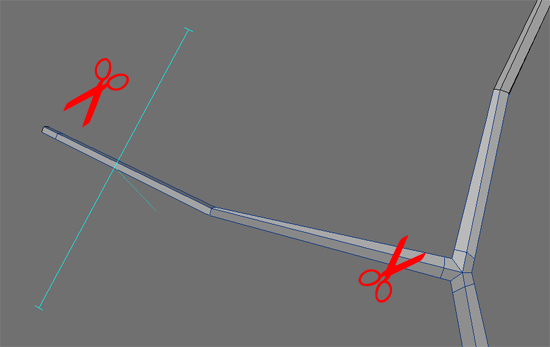
3. on Then branches there are several errors like this, so inspect the whole topology and then fix the issues when you found some :
In Lightwave, I Used the drag tool, then “Delete polygons” and then “merge points”, to clean up a little bit the model.
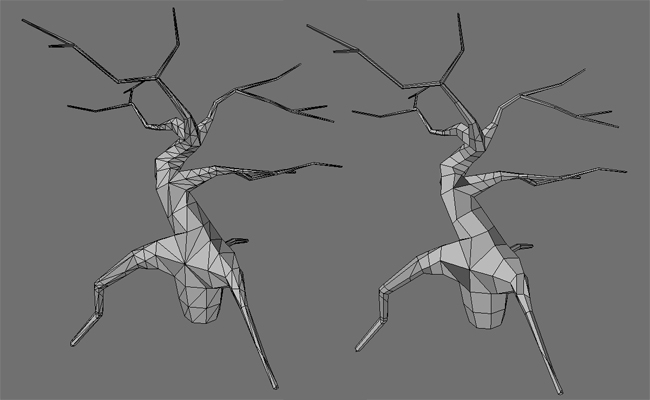
4. Improve the branches subdivision before we go back with the edited model in Zbrush.
Now the model has been loaded in Zbrush, look at the result when I apply the a subdivision on the new model.
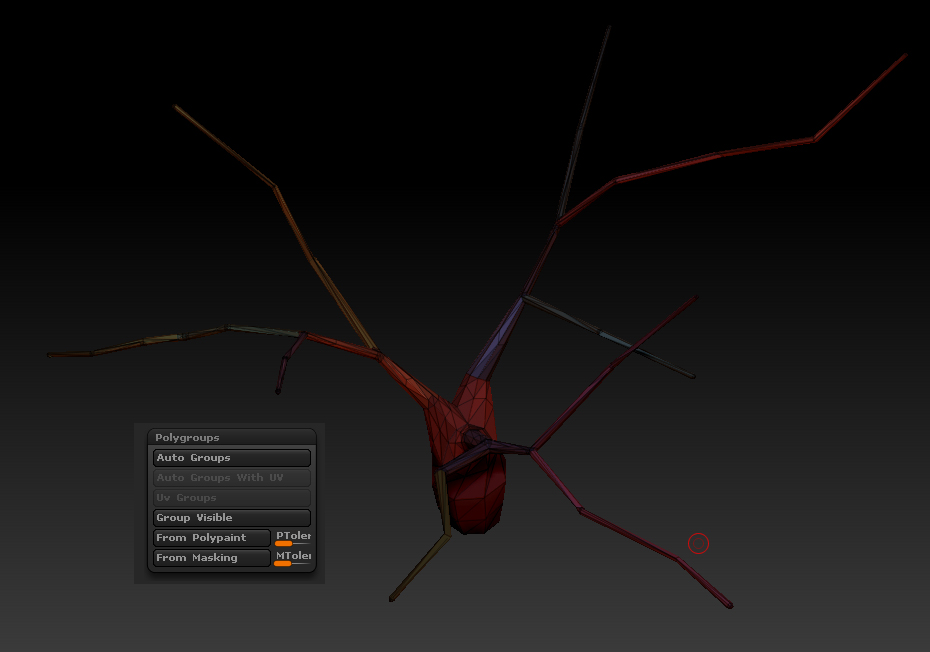
Now we have to create the polygroups to prepare the UV Unfolding with Uvmaster plugin.
Create the polygroups
Use the Lasso, Rectangle, Hiding tool, with Polygroups > Group Visible command.
- More detail in the Improve the polygroups tutorial.
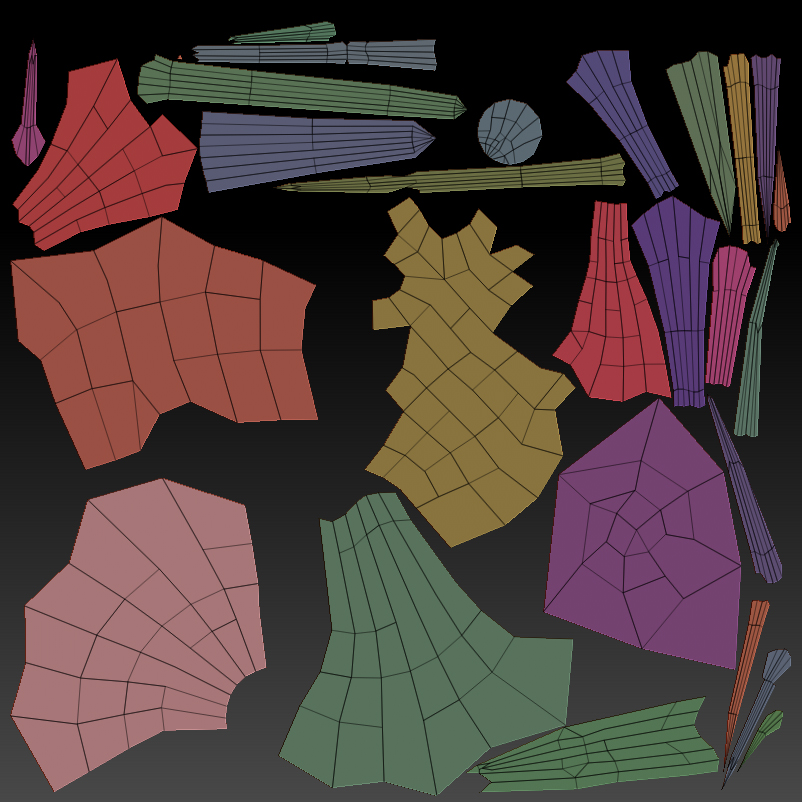
Unwrapping
More details with the Uvmaster Tutorial.
Sculpt Techniques
Now take place for the sculpting session !
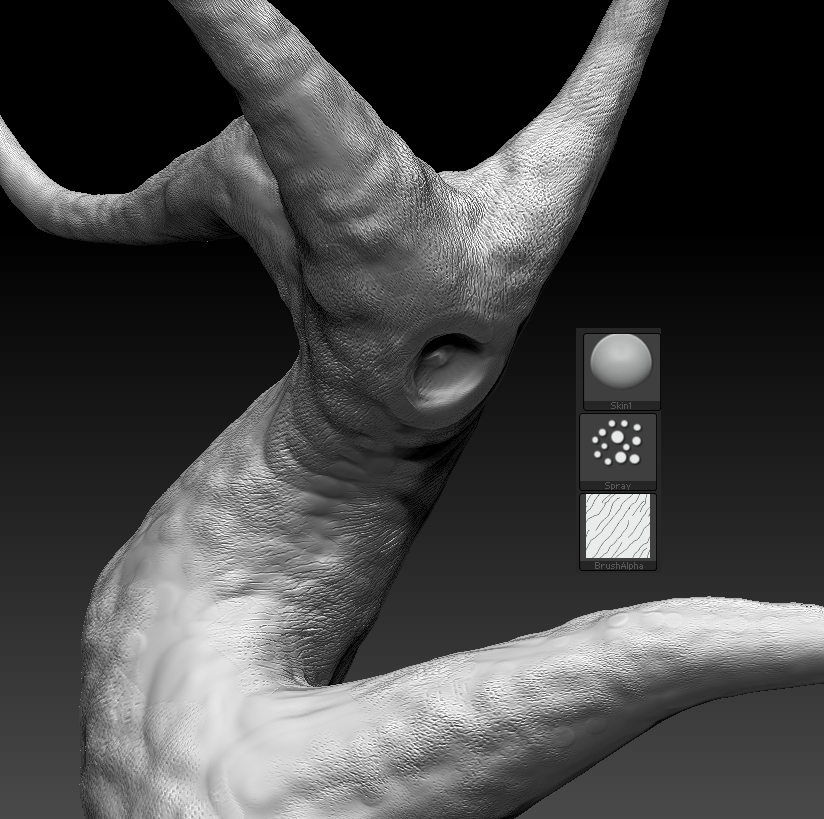
1. I begin with standard shape Brush ( add/sub )
Note : I preserve the end of the branch, or use an appropriate brush draw size on it.
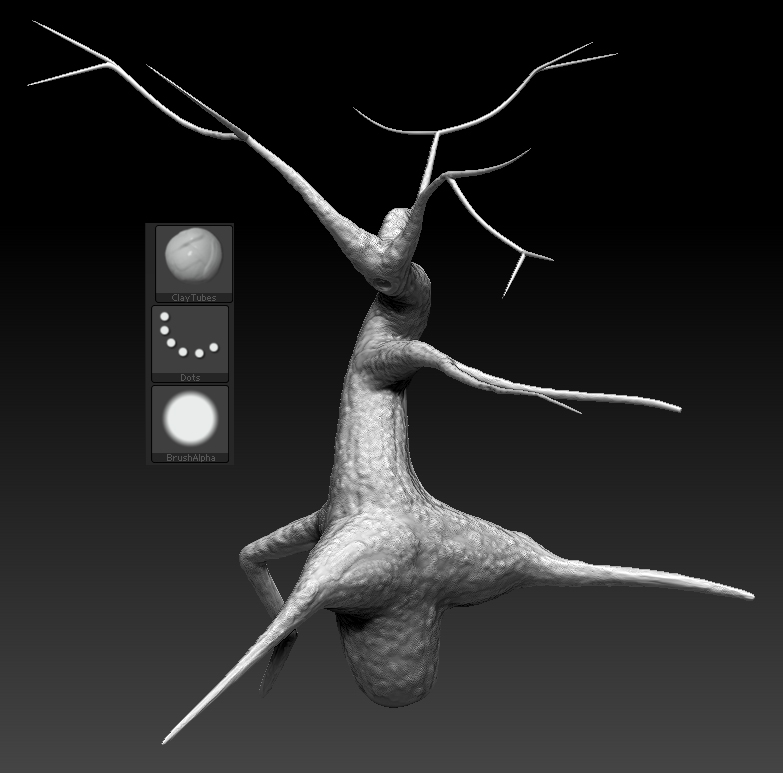
2. I use the SKIN1 brush in Spray Stroke and i use various size and Z internsity
Painting Techniques
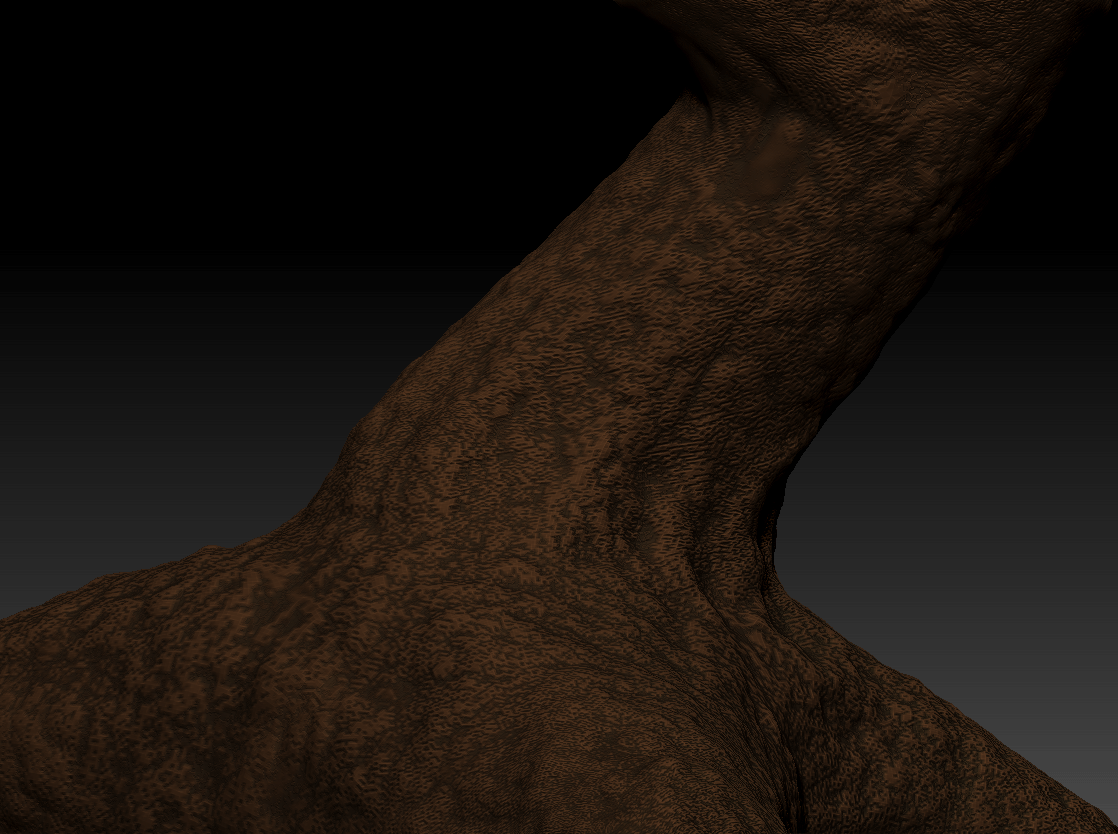
Base color
1. Now I activate the polypaint by clicking on Colorize.
2. I selecting the base color of the bark on the color palette
3. Create a new layer, and rename it “base color”.
4. For the brush settings, we must to uncheck Zadd and Zsub, just enable the RGB only.
5. Color Tab > Fill Object

6. create a new layer, rename it “Cavities Depth”
7. In masking panel create a mask by cavity, tweak it has you wik and then add some variations of color tones , it will give a deeper aspect for the smalls details.
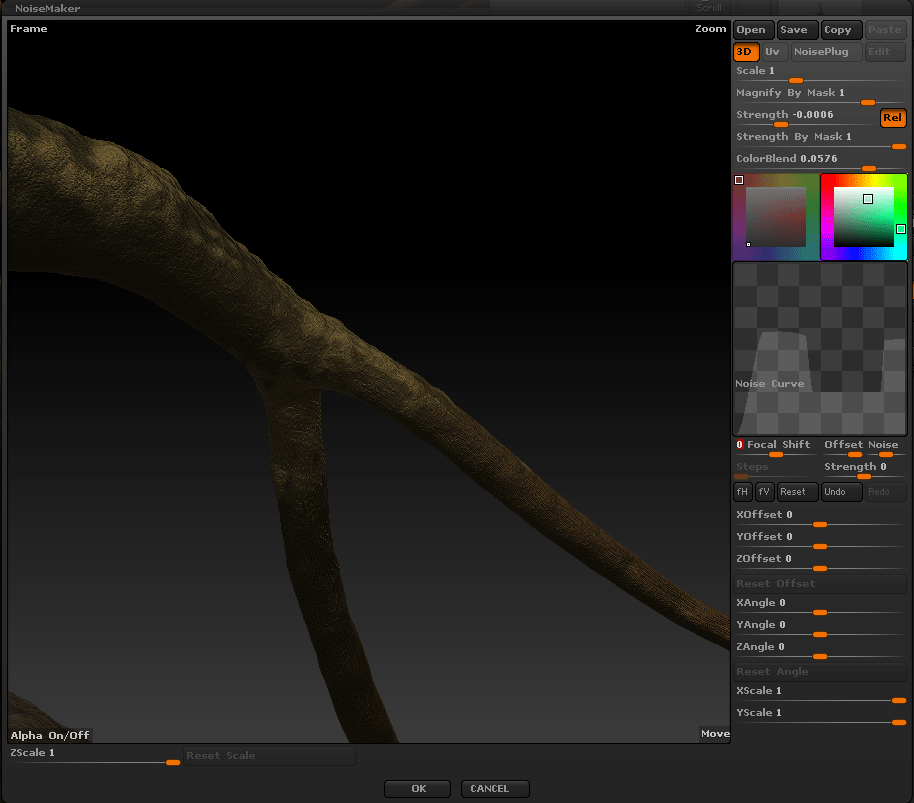
Using NoiseMaker
Let give a try with the noise maker. I play around with the parameters and it finally give me an acceptable aspect to make that tree bark aspect.
Adding More details
I added one new layer , and mask tweak by peak and valleys, then I painted some color variations here and there, using the Spray tools, and finally reduced the layer opacity a little bit.

6. Painting Details ( RGB mode active)
Now you can export your normal map and your diffuse map
Enjoy the render !
IMAGE!!!
Conclusion
This tutorial is a subject to update content because of the reasons describes below :
Yes the tutorial is old, the techniques are approximative, and the final texture look like nothing realistic, but it gives a complete workflow to create very personal trees.
All step done in Lightwave, but all can be done with any 3d modeling tools, just to cite some, : Blender, Silo, Maya, 3dsmax or what ever you want.
you would possibly want to edit the UVmap and change the layout, before to start to paint your tree.
Another workflow to get the low polygonal model done and prevent to have to edit the model into an external 3d applications, should be the retopology tool that Zbrush offers, but i am now using 3d Coat for all my retopology works.
Next parts
The next tutorial is naturally the one that would explain how to create nice foliage to use them as clip map and how to populate your model with a set a foliage variations