Let Start using the Texturer module
Workspace setup
- Define a Workspace Directory. [wp-svg-icons icon=”tree” wrap=”i”]
- Define a ProjectName. [wp-svg-icons icon=”tag” wrap=”i”]
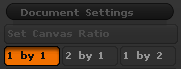
Document settings
- Define the Texture ratio.
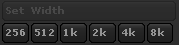
- Define the Width Size.
Texturing Tools
- Click on the Framer that match the texture resolution.

- Drag it on the canvas, and enter edit mode.
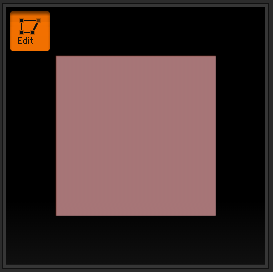
- Click the “Frame Render Area” icon (
 ) to frame on the Render Area.
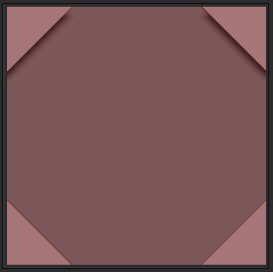
Working with wrap planes
- Go to the subtools stack and select the fourth Subtools ( the first three subtools )

- Then hit Divide wrap plane.
How to proceed to paint on the opposite border:
Tips to work with 1:1 texture resolution ( Square)
To paint on the opposite border, use the wrap mode 1, or if you want to increase the tiling, use wrap 2, wrap 3, etc…

If you don’t want the top and bottom borders to to tile, as usual you would have to protect the area using the masking.
Tips to work with 2:1 texture resolution ( width > Height)
To paint on the opposite Right and Left borders use the wrap mode 1.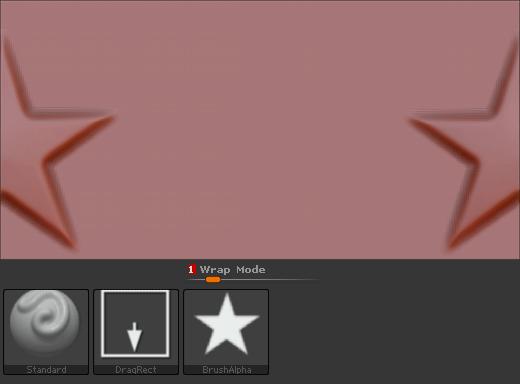
To paint on the opposite Top and Bottom borders use the wrap mode 2 + Masking .
Tips to work with 1:2 texture resolution ( Height > Width)
To paint on the opposite Right and Left borders use the wrap mode 2 + Masking .
To paint on the opposite Top and Bottom borders use the wrap mode 1.
The brush wrap mode will return to Zero when you switch to a different brush.
Click on the Apply button to apply the value to the current brush.
![]()
Working With Alpha masking and Deformation tools
Tips:
- To make the alpha to tile on the proportion of you can tile the alpha so it match the 2:1 or 1:2 resolution ( into alpha:modify)
- Try with tools layers
Working with Nanomeshes:
- Define the texture resolution ( 1 by 1, 2 by 1 or 1 by 2) .
- Define the number of row and columns
- Click to create the plane mesh
- Append the new plane mesh to the appropriated framer.
- Make the plane mesh the active subtool then click “Tile me” button.
- Use the ZModeler brush and Insert nanomesh
Tips:
- You can use ZModeler polygroups function, to apply different nanomesh.
- Ttry insert/ remove edge loop .
Working with fibers Meshes
- You must to apply the fibers preview will not render.
- Take care the subtools has no duplicated name.
Working with insert meshes
- Duplicate the subtools*
- Rename the subtools*
- Apply the offset using the compass, the mesh will perfectly be positioned at the opposite border.*
* all these functions are accessible from the module panel.
Tips:
- use the first subtool as plane to make the positionning of the mesh to insert.
When done Split unmasked point ( button around the compass) - take care the subtools has no duplicated name especially in that case Zbrush duplicate the name of the subtool that is the active subtool, it important to rename the subtools, there is an icon near of the compass).
Rendering process
So now you have your texture work done, you want to render it, so
- Enable the passes you want to render
- Run the rendering process
- Go Core module in File Menu, and select the Texturer module.
- Select the render pass you want to edit with the image editor then click ZB to PSD Icon.
Understanding the render passes resolution.
When you want to create a tileable texture, you must to set the document size, using the Documents Setting section of Texturer module.
Why is it so important ?
To make perfect seamless texture, because usually we achieve the tilling using heal tools and content aware feature that photoshop propose.But that is not technically acceptable,
and for this reason you must to run the Rendering process, only when you are sure you framed the canvas on the render Area subtools on the framer Ztool.
- 259>256 ( margin 3 pixels)
- 518 > 512( margin 6 pixels)
- 1036 > 1024( margin 12 pixels)
- 2072 > 2048( margin 24 pixels)
- 4144 > 4096( margin 48 pixels)
- 8192 > no margin possible at the moment
An example :
When you use a square texture resolution of 2048*1024, in real the canvas size in Zbrush is 2072*1036.
It contains a margin that protect the seams when you export from Zbrush, the Texture must to be cropped to the value you are familiar with so 2072 become 2048 and 1036 become 1024.
How to fix the textures with the Image Editor.
When you edit the texture, and go to canvas size in photoshop, the resolution is 1036*1036
Keep it centered, and just change the values to the normal values so.. 1024*1024
the tiling is now perfect , you can apply an offset filter to verify.